How to Edit Love Handles in Photos (Naturally)
Quick answer
To edit love handles in photos, start with a three-quarter angle and even side lighting, then use a waist-slim tool like Chisel's, staying inside its green natural limit so the taper still matches the rest of your torso.
Key takeaways
- Camera angle and lighting remove more apparent love handle shadow than any slider can
- Chisel's pose detection finds your torso automatically — no manual masking needed
- Stay inside the green natural limit on the waist slider so the edit stays believable
- Pair a waist edit with slight ab definition so the new line matches the rest of the torso
- Export at full resolution or share the animated before/after reveal
Editing love handles out of a photo comes down to camera angle, lighting and a careful waist slim — not a diet change. Here's how to edit love handles in photos so the taper still looks like your real body, using Chisel's green natural limit as the guide.
Why do love handles show up in gym and mirror photos?
Most "love handle" shadow in a photo isn't really about your body — it's about the camera. Shooting straight-on under flat overhead light flattens your whole side profile, so any soft tissue at the waist reads as a bulge instead of a natural curve. A different stance, better light, or a small edit usually fixes more than people expect, and the three usually work together rather than in place of each other.
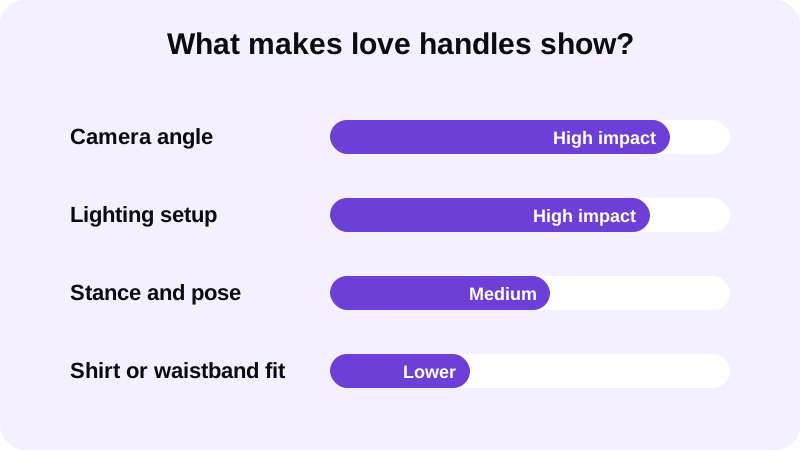
Stance matters more than most people realize. A three-quarter turn — shoulders angled slightly away from the camera — shows your real waistline instead of the widest part of your torso. Pair that with even, not-too-bright side light (see our guide on gym photo lighting) and a lot of the apparent softness at the waist disappears before you touch an editor at all. Arms held slightly away from the sides, rather than pressed against the torso, also help — pinned arms push soft tissue outward and exaggerate exactly the area you're trying to clean up. What's left after you fix stance and light is a smaller, final edit instead of a heavy one, which is always the easier edit to make look believable.
How do you edit love handles in a photo step by step?
A love handle photo editor works best when you start from a clean photo and make small, proportional moves rather than one big slider drag. Chisel's pose detection finds your torso automatically, so there's no manual outlining or masking before you start.
- Pick a photo where your torso is clearly visible — shirtless or a fitted top both work well for pose detection.
- Open the waist tool in Chisel and let it map your torso automatically; there's nothing to trace by hand.
- Move the waist slider in gradually, watching the green natural limit — stop right before it, not after.
- Add a touch of ab definition so the new waistline matches the rest of the torso instead of looking pasted on; our guide to adding definition to a photo covers this in more depth.
- Step back and check the side profile and shirt line for consistency before touching any other slider.
- Export the photo in full resolution, or save the animated before/after reveal if you want to share the edit.
It's worth doing these steps in order rather than jumping straight to the waist slider. Pose detection needs a reasonably clear view of the torso to map it accurately, so a cropped or heavily shadowed photo will give you a rougher starting point no matter how carefully you edit afterward. Starting from a well-lit, well-posed photo means the waist tool has less work to do, and less work from the tool means a result that's easier to keep inside the natural limit.
How do you keep a love handle edit from looking fake?
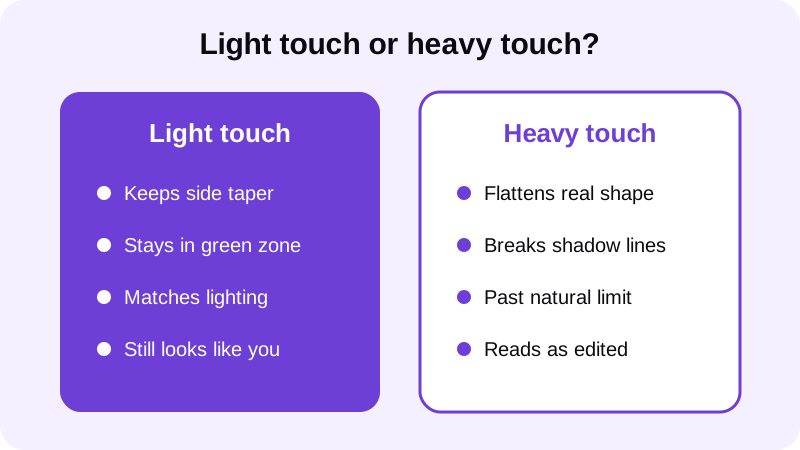
The giveaway on almost every bad waist edit is the same: the slimming doesn't match the lighting or the rest of the body. Shadows stop where the old waistline used to be, or the hips and shoulders still imply the original size. A believable edit changes the whole picture a little, not one spot a lot.
- Edit in small increments. Watch the result after each small move instead of dragging straight to the limit.
- Keep skin texture and lighting intact. Over-smoothing the waist while the rest of the photo stays textured is an easy tell.
- Check the shirt or waistband line. If fabric still bunches where the love handle used to be, the edit and the clothing disagree.
- Balance the torso. A slimmer waist paired with no change anywhere else can look disconnected — a little added muscle volume through the chest and shoulders, as covered in our guide to adding muscle to a photo, usually ties it together.
It also helps to start from a photo that already gives the edit less to do. A slight turn away from the camera, a fitted (not baggy) top, and side lighting instead of flat overhead light all reduce how much slider movement you need in the first place. Our guide on taking a good shirtless photo walks through pose and framing choices that make this part easier before you ever open an editor. Good posture does similar work for the same reason: standing tall with shoulders back naturally pulls the waistline in, which is a pose fix rather than an edit, and our guide on fixing posture in a photo covers it in detail.
All of this editing happens on the device itself — Chisel never uploads the photo to a server, and the app doesn't require an account to use its core tools. That matters for a photo you might not want sitting on someone else's servers, and it means the edit happens as fast as you can move a slider. The core editing tools, including the waist slimmer, are free to use; Chisel Pro removes ads and the watermark and unlocks every tool, with a short free trial if you want to test it first, and a one-time Lifetime purchase is available as an alternative for anyone who'd rather not subscribe.
Where else can you learn to edit a gym photo naturally?
Love handles are usually one piece of a bigger waist-and-torso edit. These guides cover the rest of it:
- How to hide belly fat in photos (naturally)
- How to make your body look leaner in photos
- Chisel AI: what it is and how it works
FAQ
Can Chisel actually remove love handles from a photo?
Chisel can slim the waist and add ab definition in a photo, which reduces the shadow that reads as a love handle. It edits the image only — it doesn't change your actual body, and every slider stops at a green natural limit so the result still looks like you.
What's the best camera angle to avoid love handles in photos?
A slight three-quarter turn, rather than a flat front-on shot, usually hides more side-waist shadow than any edit can. Combine that with even side lighting and you'll often need a much smaller waist-slim edit afterward.
Will a big waist edit look obviously fake?
Yes, if you push past the natural proportions of the rest of the photo. Chisel marks a green natural limit on the waist slider for this reason — staying inside it keeps the taper believable instead of looking pasted on.
Do I need a professional camera to fix love handles in a photo?
No. A phone camera, decent light and the right stance do most of the work. Editing a photo with Chisel's waist and ab tools is a smaller, final step on top of a well-shot photo, not a replacement for it.
Is editing love handles out of a photo dishonest?
Chisel writes an AI-altered label into the edited photo's metadata, so the edit is disclosed rather than hidden. It's a photo-editing tool for men's physique photos, not a claim about your actual body.